Big Data – MongoDb


Maybe lately you’ve heard about Big Data, but, what is Big Data? Big Data is a new way to store data. Common databases uses a Relational schema to store the data. Big Data databases use files to store the data like JSON data. This kind of data base is for a systems with a big amount of data that can increase a lot every day. In the examples we will see that the data manipulation is very fast.
There are some Databases of Big Data like RavenDB, Cassandra, HBase or MongoDB. We are going to use this last database. You can download it from his page (http://www.mongodb.org/).

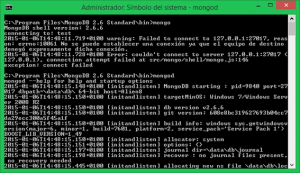
After finish the installation we need to start the database. To start it, you need to go to the installation folder through cmd and launch “mongod” command.

1

Now we have the database running. I use the MongoVUE to manage mongoDB with a GUI (http://www.mongovue.com/). Is easier to see the data than through console.

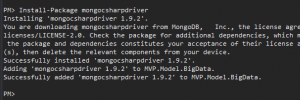
To start with our project, we need to install the libraries in our project. I have created a new project in our MVP project to put inside the MongoDB access and libraries.. Again we can do it through Nuget. In addition, we need to add in the UI projects the references or copy it in post-build events.

2

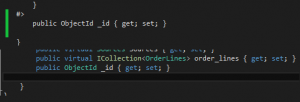
Ok, the first step is to “convert” our entities in MongoDB entities. That is easy. MongoDB, as other NoSQL databases uses a pair of key-value to store the data. This key is stored in a “_id” field, so we need to create this property in our Entities. To do that, we have modified the “.tt” file to add it when the entities are generated.

3

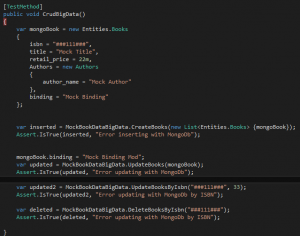
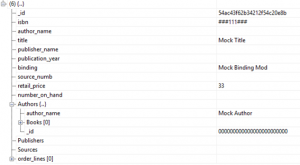
We have inserted some data to test it. We have inserted the data through Unit Tests, and in addition we have created test to show how to insert/update/delete data in MongoDB. We have created this methods in the class instead the interface because we only want to show how to do it. If all of our repositories needs to manipulate data, we should put it in the interface and implement it in all the classes that inherits from it.

4

8

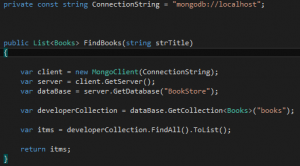
To connect to MongoDB we need to specify the server and the database (as relation databases) and work with a collections. This is similar to tables in relational models.

6

We have modify the Unity config file to map to this new library and now we are retrieving the data from MongoDB.

7

This post is only a little overview about how to start with Big Data and NoSql databases. Obviously MogoDB have more functionality and capabilities but this is a good point to start to test it and see how it works.

You can download the code here.
Unitary Tests


Probably you have Heard about Unitary Test but you don’t use it. It’s funny because when you talk about unitary test, everybody knows what are but noone use it… Under my point of view, this is an error. Unitary test allow us to test our application in few minutes and only with a click. Is useful to detect regression errors or error over different databases (if apply), countries, etc.

We are going to add unitary test to our MVP Project. The first step is create a unity test Project and after that we can start to create the methods to test every functionality of our application. We will use RhinoMocks framework, that allow us to test your MVP pattern. RhinoMocks create associations between our interfaces and  the implementations.

1

Now, we can create our test and use RhinoMocks to associate interfaces to his implementation. You can use Unity too but in my case i prefer put directly the implementation through RhinoMock because i can test several implementations for the same interface.

2

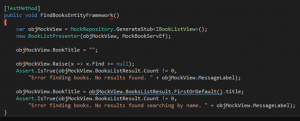
We have put the two implementations for our method, so depends which one we call we are going to test the Entity Framework or the list.

3

We have initialized our view through RhinoMocks too and we have used the E.F. service (we will have another one for the list). We call Find event and if we don’t get results we will launch an error). After that we retrieve the first element and we try to search by name. Again if we don’t have any result, we launch an error.

If we test it, we can see that the methods Works fine.

4

As you can image, only clicking or “Run All”, all test start to check and if one of them fails we will have an error. If we change some part of the code and we don’t have the expected results, probably we are going to get an error too (depends the implementation of the test), so is very useful to detect error in the entire application in an  easy way. We can test it at this level or method by method (Model, Service, Presenter, etc.).

You can download the code here.

Finishing, MVP + E.F. + I.O.C. + D.I.


End step in our Project. We will try to give more independency to each Project with Inversion of Control (IOC) and Dependency Injection (DI). What are these two concepts and his benefits?

I.O.C. Commonly, in the normal workflow, our code calls an specific method in a library. In IOC, we call a generic interface that returns an expected response, but the responsibility to know what method needs to call is from an external source. Sometimes this implementation is called “Hollywood Principle” due to the common phrase “Don’t call us, we call you”.

D.I. This pattern is used with IOC models to supply the implementations of the methods dynamically instead call the method directly like in the normal flow. D.I. is who manage the relation between the interfaces used in IOC with his implementation.

Ok, after the theory, is time to implement that.

How to start? The first step is start with IOC, creating the interfaces for our methods. We are going to separate the Contracts in 3, “Views”, “Services” and “Data”.

The first one is for our views, the second for the services (that are called from presenters and calls data) and the data (that has the communication with our database). The objective is not call the methods directly, all calls should be through interface.

We have created and interface for data with our method and we have inherited from it in our Data Access repositories.

1

Now we need to create a service that is the responsible to call this methods (always through the interface. We cannot call the methods directly). We need to create a project to put the services (or we can call the data layer directly from the presenter, but is recommended to have an intermediate layer).

2

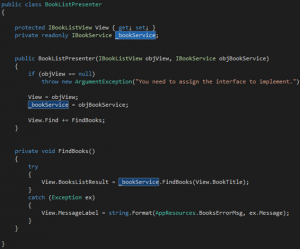
We need to have a variable with our Repository (always through the interface) and call the methods of our interface (not the class directly as in a common x-layer design). We need to initialize it in our constructor as you can see in the image. We can have more than one repository in our services layer.

The end step is to replace our call in the presenter for our service layer. Again we will need a variable of our service layer that should be initialized in the constructor.

3

Now, we have implemented IOC, we have not called any method because we are delegated this to the interfaces. Doing this, we cannot know, who or how the method will be resolved.

Probably you are thinking, “How I know that I’m calling the right method? Which method are calling?” Solve this is the responsibility of D.I. Our D.I. manage the “routing” of the methods to call. We have chosen Unity, that is the D.I. proposed by Microsoft.

To install Unity we can use Nuget.

4

Ok, the first step is configure it. I prefer to configure it through xml because is more flexible than by code (we can change it at runtime and we don’t need to compile it and deliver a new version). We have created a file to put the configuration (UnityConfigFile.config).

By one hand we need to put our interfaces registering an alias.

5

By the other hand we need to specify which class (that implements this interfaces) will be used.

6

Finally we need to initialize the Unity Provider in our global.asax. We have created a class called InjectionProvider to register Unity. You can copy/paste it in your Project to use it.

7

And we need to create the presenter in the view through InjectionProvider.

8

Maybe you can have an error (The type name or alias MVP.Model.BookRepositoryEf, MVP.Model could not be resolved. Please check your configuration file and verify this type name.). This error is due to the libraries. You don’t have any reference to your “Model” and “Service” Project, so Unity cannot find it, you need to add your dll to the bin folder. You can do it manually or with post-build events.

Now our methods are managed by the D.I., so if we want to change how the application works, we only need to change the xml file. You can do the test changing the data Access layer (we have both, one with E.F. and another one with a static list) and you will see that the functionality of your application changes only changing a xml file.

9

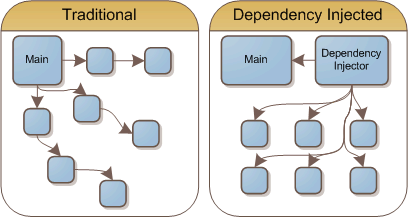
You need to think that now you have small blocks (classes that implement interfaces) and you can connect this classes dynamically. You can think in the teleoperators of last century with his cables connecting the class dynamically depending who calls.

10

For WinForms and WPF you need to do the same. Add Unity, include the InjectionProvieder, call the initializer and create the presenter in the view trough Unity.

You can download the code here.