Code Analysis with SonarQube and C#
Sometimes, and especially when our application is huge or there are a lot of people working on it, maybe is usefull take a global vision of the state of the source code, view the possible improvements, avoid possible future issues or be aligned with the design guidelines.
There are a lot of programs to manage this, even Visual Studio has his own Code Analysis (in my opinion is very poor). For me, one of the best is SonarQube, that have a web interface and is easy to track, view, get reports, etc. In this post we will configure and run SonarQube with C# for our project.
The first step is download SonarQube from his page (http://www.sonarqube.org/downloads/). We unzip the files in a folder. We need to take into account that SonarQube not needs install it, the files that it needs for run are these files unzipped.

The next step is go to this folders and find our distribution inside bin folder, in my case “windows-x86-32“, and execute StartSonar.bat to configure apache and SonarQube. Probably you can get an error if you don’t have JRE installed. You can download it from here. After that you can navigate to http://localhost:9000 to display the home page of SonarQube.

You can change some parameters from a config file inside installation folder (conf/sonar.properties) to manage the port, connection pool, proxy, etc., but we can use the default parameters). Ok, now we need to install the plugin for run C# or VB.Net projects. We make login in the application (admin/admin) and we go to Update Center menu (on the left). Here we can see the installed o available plugins.

We install the C# and .Net plugins. After that we need to restart the SonarQube (we need to close and launch again StartSonar.bat). We are finishing our configuration, we only need the last step, get a runner, in this case we will use Sonar-Runner (we can use others). We can download it from here. As SonarQube it no need to install it, is enough with download the files. Now we have all ready to work. To avoid go to the folders each time, we can register the path in “Windows path” to recognize the program names (Computer/Properties/Advanced system settings/Environment Variables). We search the Path variable and is needed to add the folder that contains StartSonar and the runner (D:\sonarqube\sonar-runner-2.3\bin\;D:\sonarqube\bin\windows-x86-32\; in my case). With that we can start SonarQube or Runner only typing StartSonar or sonnar-runner in a cmd window.
We need to go to our solution project and create a file called sonar-project.properties. In this file we need to configure the project Name, path and the language. We need to place this file in the same place that the solution. This is the common content of the file:
sonar.projectKey=KeyOfTheProject
sonar.projectName=NameOfTheProject
sonar.projectVersion=1.0

sonar.sources=.
sonar.language=cs
sonar.sourceEncoding=UTF8
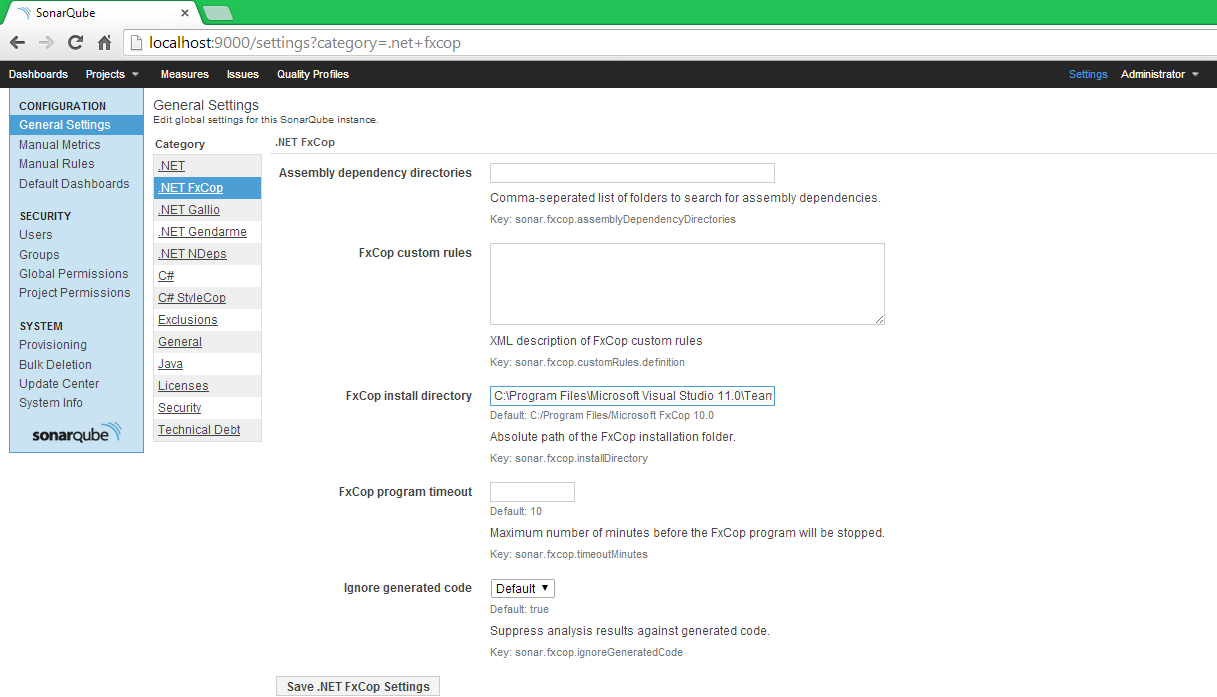
It’s time to analyze our project. We need to open a cmd screen and go to our solution folder. After navigate to the folder we type “sonar-runner” and the analysis starts. If you have an error about FxCop, you need to go to the SonarQube Portal, go to General Settings and in .Net FxCop we need specify the path of FxCop.
Run again the sonar-runner and this time should be work. When the analisys ends, we can see in SonarQube portal a new link on the left with our project and the results:
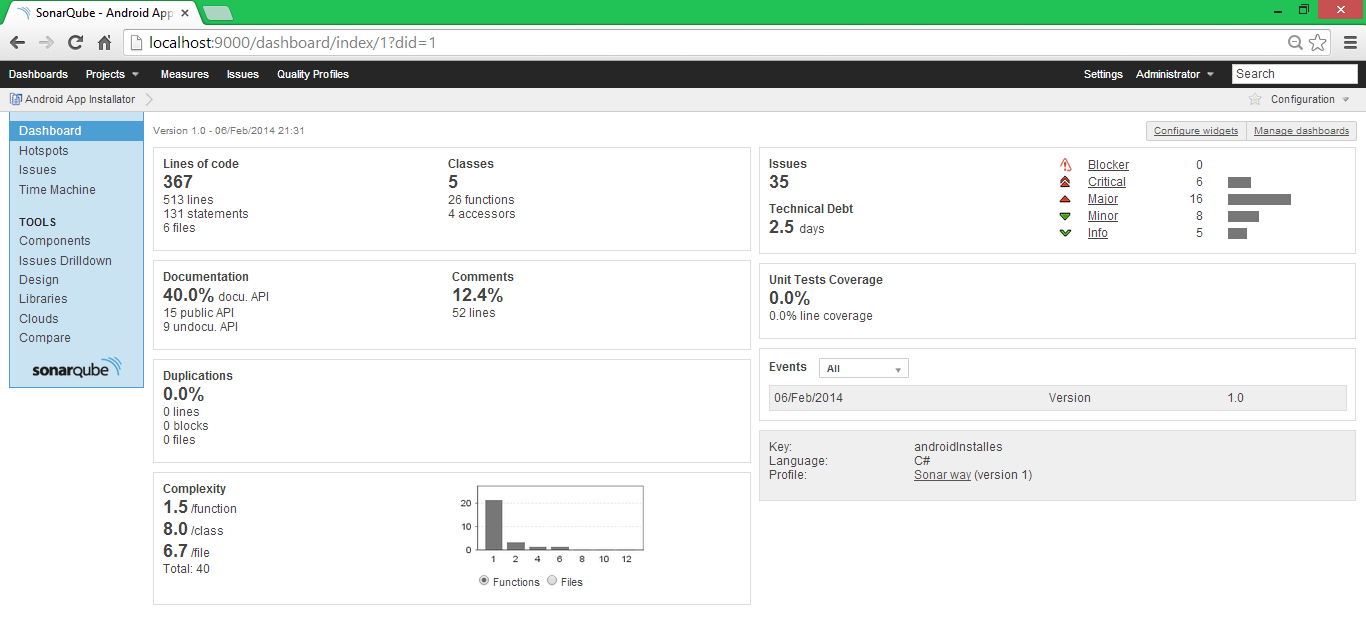
You can detail each kind of issue, see graphics, summary, evolution, etc. The ideal is don’t have any Evidence or the less possible.
